December 12, 2010
1:26 PM | Edit Post
Supplies Needed:
Working knowledge of psp
Tube of choice, I used is by the artist Fitztown*Veronica* and is called Stardust and Pumpkin
You can purchase the tube from www.mytubedart.com
Font of choice, I am using Natural Script and can be found at www.myfonts.com
Scrap of choice I used Christmas is all around FTU by Malina Design; you can find it on her site http://malinadesign-malina.blogspot.com/
No plugins are used for this tag
Lets begin
Open PSP
File, new 600 x 600, we will resize later
Open, copy and paste frame from Scrap kit (e2)
Open paper of choice, copy
Using your selection tool, create dancing ants around NON tilted square
Layer, new raster layer, paste into selection, select none, move to bottom
Duplicate bottom layer (layer with paper)
Using magic wand, select inside tilted square, select, modify, expand by 2, invert and
delete on copied layer
On the duplicated layer, go to Effects, effects browser, effects, choose effect(s) of choice,
(I like to play around with them) ok
Add elements of choice, once satisfied, add shadows
Add tube and drop shadow of choice
Image, resize, enter size of choice (I use 450 pixels)
*be sure to check resize all layers at this point
Add copyright and license number
Add predominate text
At this point you can save as a .png
I like to add another layer and flood fill with white and save as png
Enjoy!
Xoxo Paully
another example is below:
Thank you so much to Angel for trying my tut!

Labels:Tutorials | 0
comments
June 30, 2010
9:24 PM | Edit Post
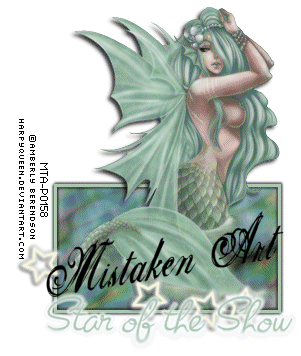
Star of the Show was written using PSP X2 and Jasc Animaton Shop
Materials used tube by Amberly Berendson which can be purchased HERE
Eyecandy 6 Gradient Glow (if you do not have this, play with your drop shadows and colors)
Template made by myself which can be found HERE
Font Selfish
Lets get started
1. Pick a tube with a great image or a tube and image that look good together.
2. Open new image 600x600 (we can resize later)
3. Copy rectangle from template and paste onto new image (adjust hue and saturation to match tube)
4. Use your selection tool to click inside. Select, select all, select modify expand by 5
5. Past image or background of image into selection, select none, move to bottom
6.Effects, EyeCandy 6, gradient glow, find glow to match tag, ok
7. Copy stars from template, paste on top of rectangle layer, add bright white glow
8.Copy wordart from template, past on top of star layer and soft gradient glow
9.Copy tube, past on top of background layer/below stars and wordart layer
10. add drop shadow.
11. add copyright and name, save
You can stop here for a beautiful non animated tag or you can take the following steps to add animation.
12. go to background layer (step 5) duplicate twice
13. 1st layer EC6 Textured noise, overlay intense dot noise
2nd layer use the same plug in, click random seed, ok
3rd layer use the same plug in, click random seed, ok
14. Open animation shop
15. Hide 2nd and 3rd layer; with 1st layer only visible, click copy merged, paste into AS as new image
16. repeat above step hiding the layers as needed until all layers are used, paste into AS after current layer
17. Once you have all 3 layers in AS, click Edit, select all
Amination, frame properties, 35; view animation and save.
Disclaimer: I am very new at writing tuts, please remember to have fun and if you have any questions, please email me at paully-1@hotmail.com
For some reason, I cannot get the animation to show when I post...if you can assist with this, please email me. thanks

Labels:Tutorials | 1 comments
June 28, 2010
8:40 PM | Edit Post
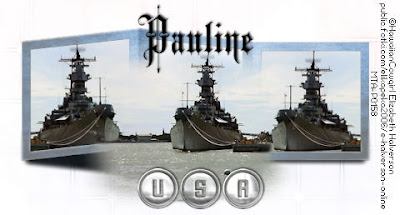
Hi! Here is a tutorial I wrote today and hope you all enjoy it.
It is a fairly simple tutorial and please keep in mind that this is new for me:)
For this tutorial you will need a working knowledge of psp as well as an open mind.
I have used a scrapkit called I Love USA by Carita and you can find purchase it HERE.
I have also used 2 photographs (1 regular and 1 feathered) from Hawaiian Cowgirl and you can purchase them HERE
Font is called Showcard
Lets get started.
1.open a new image 600 x 600 (you can resize later)
2.copy the frame and paste as a new layer
3.Paste feathered picture on top of the center frame.
(I used the soften brush to blend the sides into the frame)
4.Use magic wand to click inside the left box of the frame
select, select all, select modify, expand x 4
5. layer, new raster layer, paste into selection
move below framed layer
6. repeat for the right side (before doing this, I mirrored original picture)
***at this point you may need to reposition the feathered layer to make it flow****
7. Select heart element (multicolored in the shape of a heart)
copy/paste below the photo and the frame
Do not resize *soften as needed
8. Select the "USA" word art
copy/paste on top and toward the bottom center of the feathered layer
resize 40%
9. Add drop shadow V -1, H 1, Opacity 80, Blur 3, Color black
10. At this point I adjusted the color of the frame to a light blue (this is optional)
11. Add correct copyright information, resize and save
I hope you enjoyed the tut, if you have any questions, please email me at thepspdiva@gmail.com or paully-1@hotmail.com
xoxo Paully

Labels:Tutorials | 0
comments
June 11, 2010
7:36 PM | Edit Post

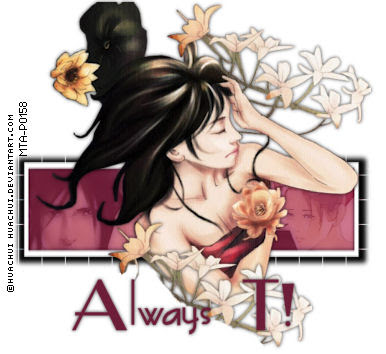
Supplies needed:
working knowledge of psp
3-5 tubes of choice
font of choice
1. open psp
2. file new (Ctrl + N) 450 x 450- can be resized later as needed
3. use rectangle preset; white foreground, null background, width 5
make rectangle as large/small as you would like
4. convert to raster
5. copy and paste your tubes into rectangle
6. click inside rectangle, select all, select float, modify 3, select invert, click on each tube and hit
delete
7. merge tube layers
8. click on rectangle layer, select all, select float, modify 4
layer, new layer, flood fill with color of choice, change opacity to about 60, select none, move
below rectangle layer, above tubes layer
9. click on rectangle layer, add drop shadow of choice
10. merge rectangle layer, color layer, tubes layer
11. duplicate
12. on original (bottom); adjust blur gausion blur 2
13. effects, texture, weave (gap 22, width 1, opacity 96, ok)
14. click on duplicated layer (top)
15. resize 96% (make sure resize all layers is NOT checked)
16. merge visible, resize as needed
17. add copyright and save
18. if you have any questions, feel free to post a comment or email me at paully-1@hotmail.com
*on the Gorjuss tag, I softened the back layer

Labels:Tutorials | 0
comments
May 31, 2010
3:56 PM | Edit Post
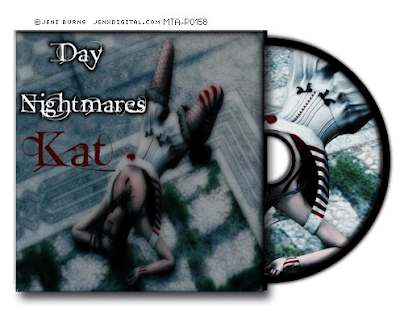
Hi! Here is my very first tutorial using the brilliant artwork on Jeni Burns. You can purchase her tubes at Mistaken Art.
Update: 7/4/19 New example using the artwork of Simona Candini. You can purchase her tubes at Creative Design Outlet
Musicality
1. Open new image 700 x 700 (we will re size later)
2. click on preset shapes, eclipse
Foreground- black, background- null
line style, width 10
draw one large circle, convert to raster
draw a small circle (change width to 5), place in center of large circle, merge
3. click on preset shapes, rectangle
Foreground-null, background black
draw square that is slightly larger than the circles, cover to raster, place below circles
4. use magic wand to click on black square, click add new layer, past image into new layer
5. add bevel of choice
mine: bevel-2, width-5, smoothness-25, depth-5, ambiance-15, shininess-35, angle-315,
color-white, intensity-65, elevation-30
*I would play with this, EC has some nice bevels as well. We want this to look like an album
cover.
6. Add drop shadow of choice.
mine: -3, -3, 75, 5 followed by shadow lab preset
7. Back to your disc (circles)
Use your magic wand to select between the two circles
select, modify, expand by 3
layer, new rater layer, paste your image into layer.
8. Move this layer below the disc layer (circles)
9. You can leave as is or soften to choice
mine: xero, soft mood, default
10. Place drop shadow on disc (circles), merge with image layer
11. Crop and add copyright information
12. Add title of album and tag recipients name
Animation
1. on tag, right click, copy merged
go to Animation Shop (AS) and paste as new selection
2. on tag, click on disc, image, free rotate, 15 right
copy merged, paste into AS after current frame
3. complete step 2 until you have made a full rotation.
4. In AS, edit, select all, animation, frame properties, change this number to 35
5. view animation and save
Thank you for trying my very first tutorial

Labels:Tutorials | 0
comments
May 29, 2010
7:34 PM | Edit Post
Hi! My name is Paully. I am known in the PSP community as I have been tagging for about 6 years now. About six years ago, my mother passed away and I turned to psp and food for solace. I still love psp and will continue to participate fully as my online family is the best! However, along with my friend and artist, Kat, I am going to embark on a year long journey. Over the next year I have a few goals in which I am going to achieve. This blog is going to document my journeys.
1. Lose enough weight to fit into a bathing suit without looking like a beached whale. (I was healthy not so long ago)
2. Save enough money for my husband to get his pilots license.
3. Improve myself at work
4. Broaden my horizens within the psp world, by learning to make stats, templates, ect
Wish me luck!

Labels:general musings | 3
comments
Subscribe to:
Comments
(Atom)
Search This Blog
Categories
- ADI
- AITM
- Alessa
- Alicat Digital Scraps
- alicia mujica
- always list
- Amberly Berendson
- Anna Marine
- Artist showoff
- Attila
- Barb Jensen
- Bella Caribena
- Bellisima Designs
- Blog Trains
- CandyShopCollab
- Caron Vinson
- CBJ
- CDO
- CDO Bundle Kit
- Challenge Tag
- Chaos Priestess
- Choas Priestess
- Christmas Collab 2020
- Christmas Collab 2024
- Collab kit
- Colourbelle
- Creative Misfits AL
- Creative Scraps by Crys
- Creepie Cuties
- CRM
- CT
- CT Availability
- CT Tag
- CT- Digital Art Heaven
- CT- Enchanted Scraps
- CT- Foxy's Designz
- CT- Kizzed by Kelz'
- CT- Midnight Shadow Dezinez
- CT- Starlite & Soul
- CT- Stormlight Designs
- Curious Creative Dreams
- cutencharming
- DAH
- DAH Match kit
- Dance In the Rain
- Dark Yarrow
- Dean Yeagle
- Designz by Shelly
- Diamond Club
- Digital Art Heaven
- Dirk Richter
- Dns Scraps
- Doodle By Design
- DSI
- Elegance Fly
- Elena Dudina
- Elias
- Enys Guerrero
- Erin Ewer
- extras
- Foxys Designz
- Freek's Creations
- FTU
- Garv
- general musings
- Giada Calo
- Goldwasser Extras
- Gorjuss
- Guest CT
- Happy Pumpkin Studio
- Heather's Devine dezigns
- Honored Scaps
- Honored Scraps
- howard robinson
- Hungry Hill
- Ian Daniels
- IB Kit
- Ilonka's Designs
- Ishika Chowdhury
- Janesko
- janestarweils
- Janna Prosvirina
- Jasmine Beckett-Griffith
- Jenny
- Jessica Dougherty
- Jose Cano
- Julia Spiri
- just be
- kajenna
- Karmalized Scraps
- Kayomi.harai
- Keith Garvey
- ken Morton
- Kizzed By Kelz
- Kizzed By Kelz'
- Koufay
- Kreative Graphics
- Ladyhawwk Designs
- Lix
- Lucky Tag Draw
- Maigan Lynn
- Marika
- Maryline Cazenave
- Mayumi Ogihara
- Melanie Delon
- Melissa Dawn
- Mia Hopper
- Midnight Shadow Dezinez
- Mike Denning
- Misticheskaya
- Misticheskaya-Match kit
- Molly Harrison
- Monte Moore
- MTA
- Mystical Scraps
- Mystical Scraps Store
- Nene Thomas
- new group
- Nikki Burnett
- Nocturne
- Paul John Ballard
- PUT
- Queen Uriel
- Rebecca Sinz
- Rene Biertempfel
- Robin Pushay
- Sale- DSI
- Sally Jacob
- Sarah Richter
- Schnegge
- Scrap Design n Company
- ScrapDesignsAndCompany
- Scrappin with Lil Ole Me
- Scrapping from the Heart
- scrappinnaturally
- scraps design n company
- SDNC Match
- SDNC- Collab
- SDNC- Foxy's Designz
- Selina Fenech
- Sheena Pike
- SheoKate
- Simona Candini
- Snags
- SQP
- Stanley Morrison
- Starlite and Soul
- Starlite&Soul
- Swan'Scraps
- Sweet Cravings Scraps
- Sybile Art
- Tag show off
- Tania Santos
- Templates
- TheVintageAngel
- Tunchy Art
- tutathon
- Tutorials
- Tutorials Grunge and Glitter
- Tutorials Scrappin Dollars
- Tutorials- DSI
- Tutorials- MTA
- Tutorials-CDO
- Two Peas In The Pod
- Verymany
- VeryMany Artist
- Vi Nina
- Vinegar
- VM-Match kit
- vmartist
- Whisper In The Wind
- Whisprd Designz
- Whisprd Dreamz
- Wicked Princess Scraps
- word art
- Yuriko Shirou
- Zindy


